Showing posts with label Maple leaf. Show all posts

Wednesday, November 2, 2016

What if? Wednesday- Nov. Color Challenge with a Shaker Card


Hi Friends, I'm slowly on the mend! Finally! I'm still not 100% pain free but getting better. Today, at The House that Stamps Built for Repeat Impressions Stamps we have a color challenge starting today.

Use the Color Chart below and Create a Card.


Repeat Impressions Stamps
Leaves colored with Copic Markers
Sequins for shaker


Challenges

Inspiration Destination #110 Anything goes
Not Just Cards October Anything goes
Creative Fingers #119 ANything goes (2/3)
613 Avenue #190 Anything goes (2/8)
Crafting from the Heart #134 Anything goes (2/3)
Craft your Passion #336 Anything goes (2/3)
Get Creative #51 Anything goes (2/3)
Retarte #89 Anything goes (1/3)
Retro Rubber #50 Fall Colors (I've had these stamps well over a year.)
Sunny Day Crafting #21 Anything goes
My Time to Craft #332 Autumnal Colors
Addicted to Stamps #134 Stamping and layers
Amusing Anything goes Stamped (2/2)
Little Red Wagon #366 Autumn

Have a wonderful Wednesday!!!

Monday, October 31, 2016

Project of the week- Fall fun Stamped Rosettes Tutorial

.Hi friends and Happy Halloween! Deonna here, i just love fall and all of the beautiful leaves and my favorite Holiday "Halloween". I thought that i'd show you how to make an embellishment today- Fall fun Stamped Rosettes. I was thinking about using these on some table embellishments for Thanksgiving  You can glue paper straws to them and put them in a vase for decoration. I like to add paperclips to the back and use them for cards, scrapbook pages, papercraft projects.
Use your imagination. Lets get started.

Supplies that i used include:

Stamps- Repeat Impressions leaves-3312-E, Maple Leaf, 3314-D, Birch Leaf, 3313-E, Oak Leaf,
Coloring media- (I used Copic Markers) 
Ink pad ( I used Stampin'up Chocolate chip) 
White Cardstock to stamp on
 Paper trimmer
 Decorative paper cut to 12" x 1 1/4"
 Border punch
 Score Board 
 1 1/4" Circle punch 
Small piece of any color cardstock to punch circles 
Scissors
 Hot glue gun
 Eyelash trim and Raffia. 

1. Stamp the leaf images using your ink pad, Color as desired and Fussy cut each of them out.


2.  Cut your decorative paper using your paper trimmer to 12" x 1 1/4".


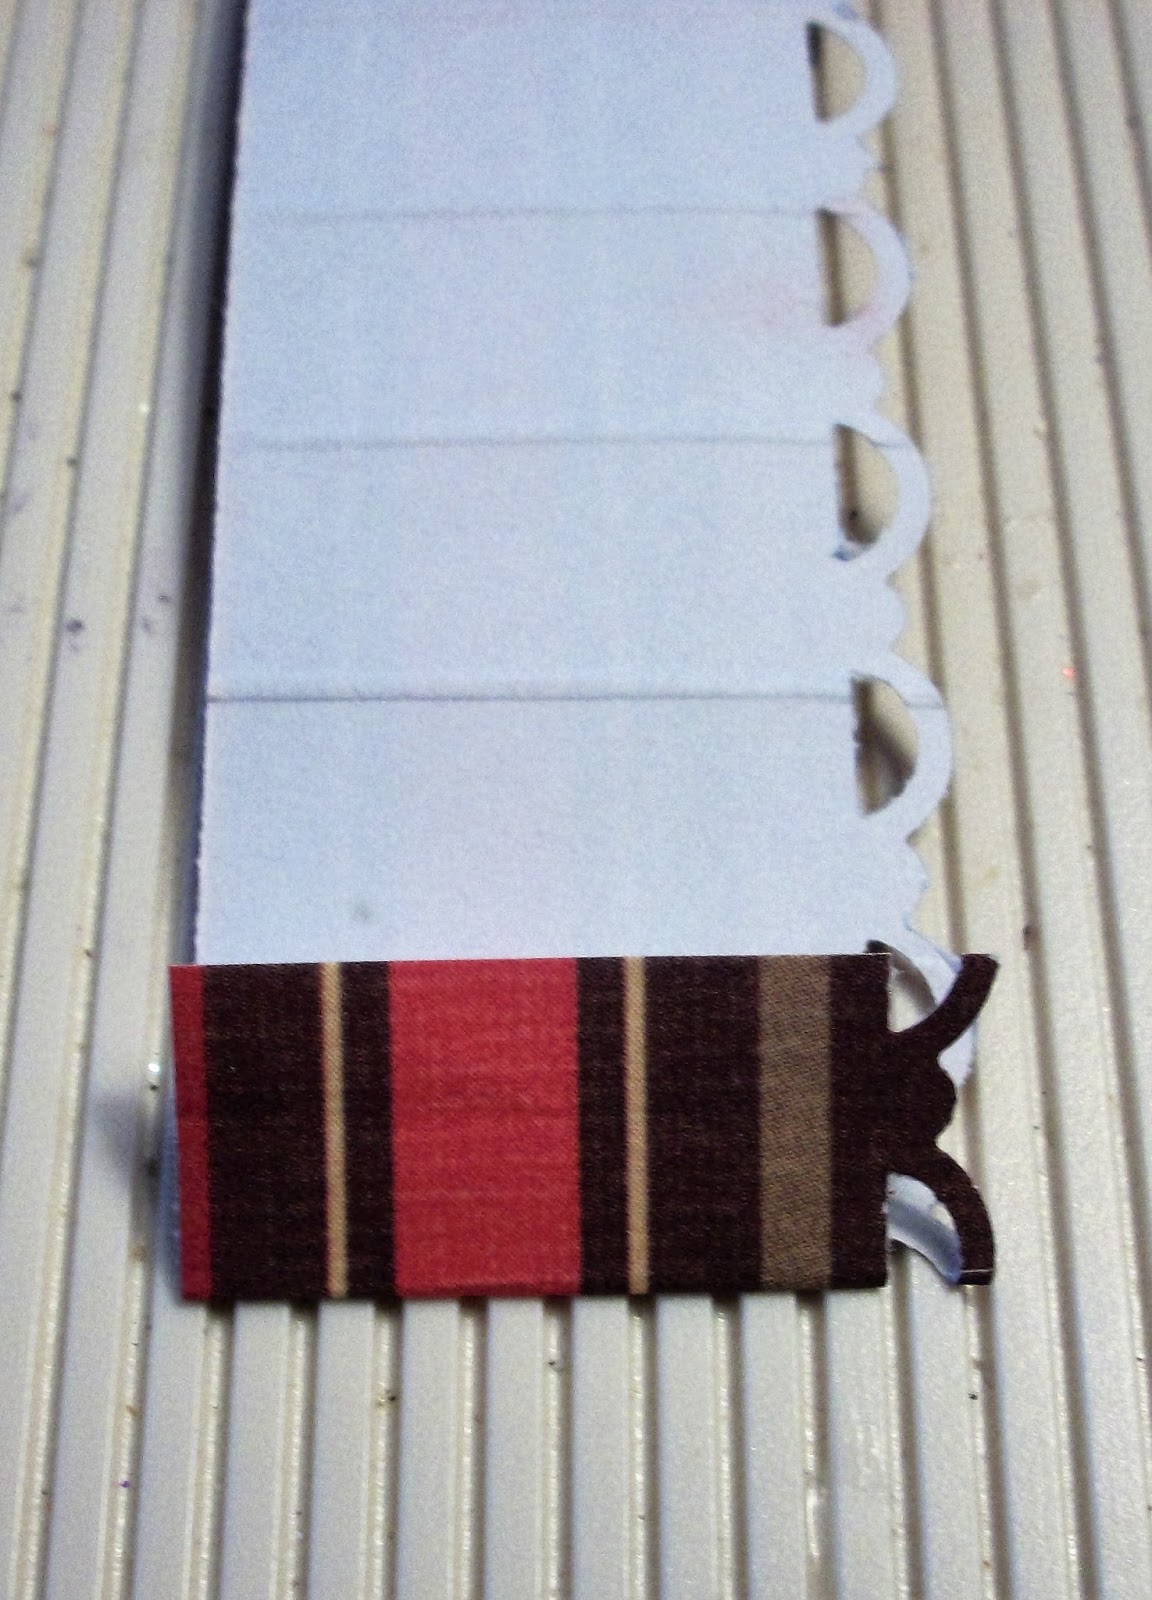
3.  Using your border punch (starting in the center of your paper) punch along each side of your strip of paper.


4. Place the 12" flat side of your strip of paper on your score board at the top and score 1/2" line across the whole strip.


5. Fold the score lines in a back and forth motion completely down the strip.


6.  Hot glue both of the ends of your scored strip of paper together.


7. Using your Circle punch and black cardstock, punch a circle.


8. Create your Rosette by pushing down the flat edge of your paper to the center.  This is a little tricky. Adhere the circle that you punched to the back side of your Rosette using hot glue.


9. Your Rosette is now ready to be decorated. I added some orange eyelash trim and folded some raffia in Red and Green. I Hot glued each of them down where desired.


10. Place your Stamped leaves to the top of your Rosette by using the hot glue. You've now completed your decorative rosette.


Challenges

Sunny Day Crafting #20 Anything goes
DL Art Oct. Linky Party
Inspiration Destination #109 Anything goes
Perfectly Created Chaos #4 Anything goes (2/3)
Creative Moments #105 Anything goes (2/3) 
Not Just Cards October Anything goes
Creative Fingers #119 ANything goes (1/3)
My Time to Craft #332 Autumnal Colors
Addicted to Stamps #134 Stamping and layers
Amusing Anything goes Stamped (1/2)
Eclectic Ellapu Autumnal
Great impressions Anything goes
Stamping Sensations Autumn with Stamp

Have a Wonderful Week! I hope that i'm on the mend.

Monday, October 12, 2015

A Autumn Tag just for you

Well i went to the covered bridge festival yesterday and had a blast. My BFF, my daughter and i went.  I didn't buy a whole lot but it sure was fun.

Today i put together a Autumn tag using one of the napkins that i bought at the festival yesterday. I loved this little Scarecrow and couldn't resist using him. 

I created this tag using the base of a manila file folder, Separated the 2 ply napkin, and using mod podge i adhered it to the base card.  I then applied a second layer of mod podge to the top of the napkin print.  After that i distressed the edges of the tag with Vintage photo distress ink.  Stamped my silhouette leaf stamps from Repeat impressions and embossed them with different colors.  Hand cut all of the leaves and applied to the tag with adhesive.


 Supplies

Repeat Impression Stamps-
Napkin
Mod Podge
Distress ink
Embossing powder
Heat tool
Jute twine


Challenges
613 Avenue #145 Anything goes (1/3)
Classy Cards 'n such #106 Colors of Fall (1/3)
Come and Get it Happy Fall Y'all UL
Fashionable Stamping #104 Changing Seasons (1/3)
Allsorts #332 No Design papers (1/3)
Di's Digi Designs Harvest Related (2/3)
My Time to Craft #306 Autumnal Colors (1/3)
Crafting With Friends #8 Anything goes (2/3)
Crafty Girls Creations #6 Anything goes (3/3)
Creative Fingers #95 Anything goes (1/3)
Fussy and Fancy #149 Autumn colors 
QKR STampede #160 Scarecrows
Simply Papercraft #15 Anything goes (1/3)

Great Start to the week!!!