Showing posts with label Tutorial. Show all posts

Saturday, April 13, 2019

Decorative Napkin Embellishments tutorial

Using a Decorative Napkin for a  Background or Embellishment? Here is a technique to help you cut the napkin in usable pieces without ripping it.

Supplies
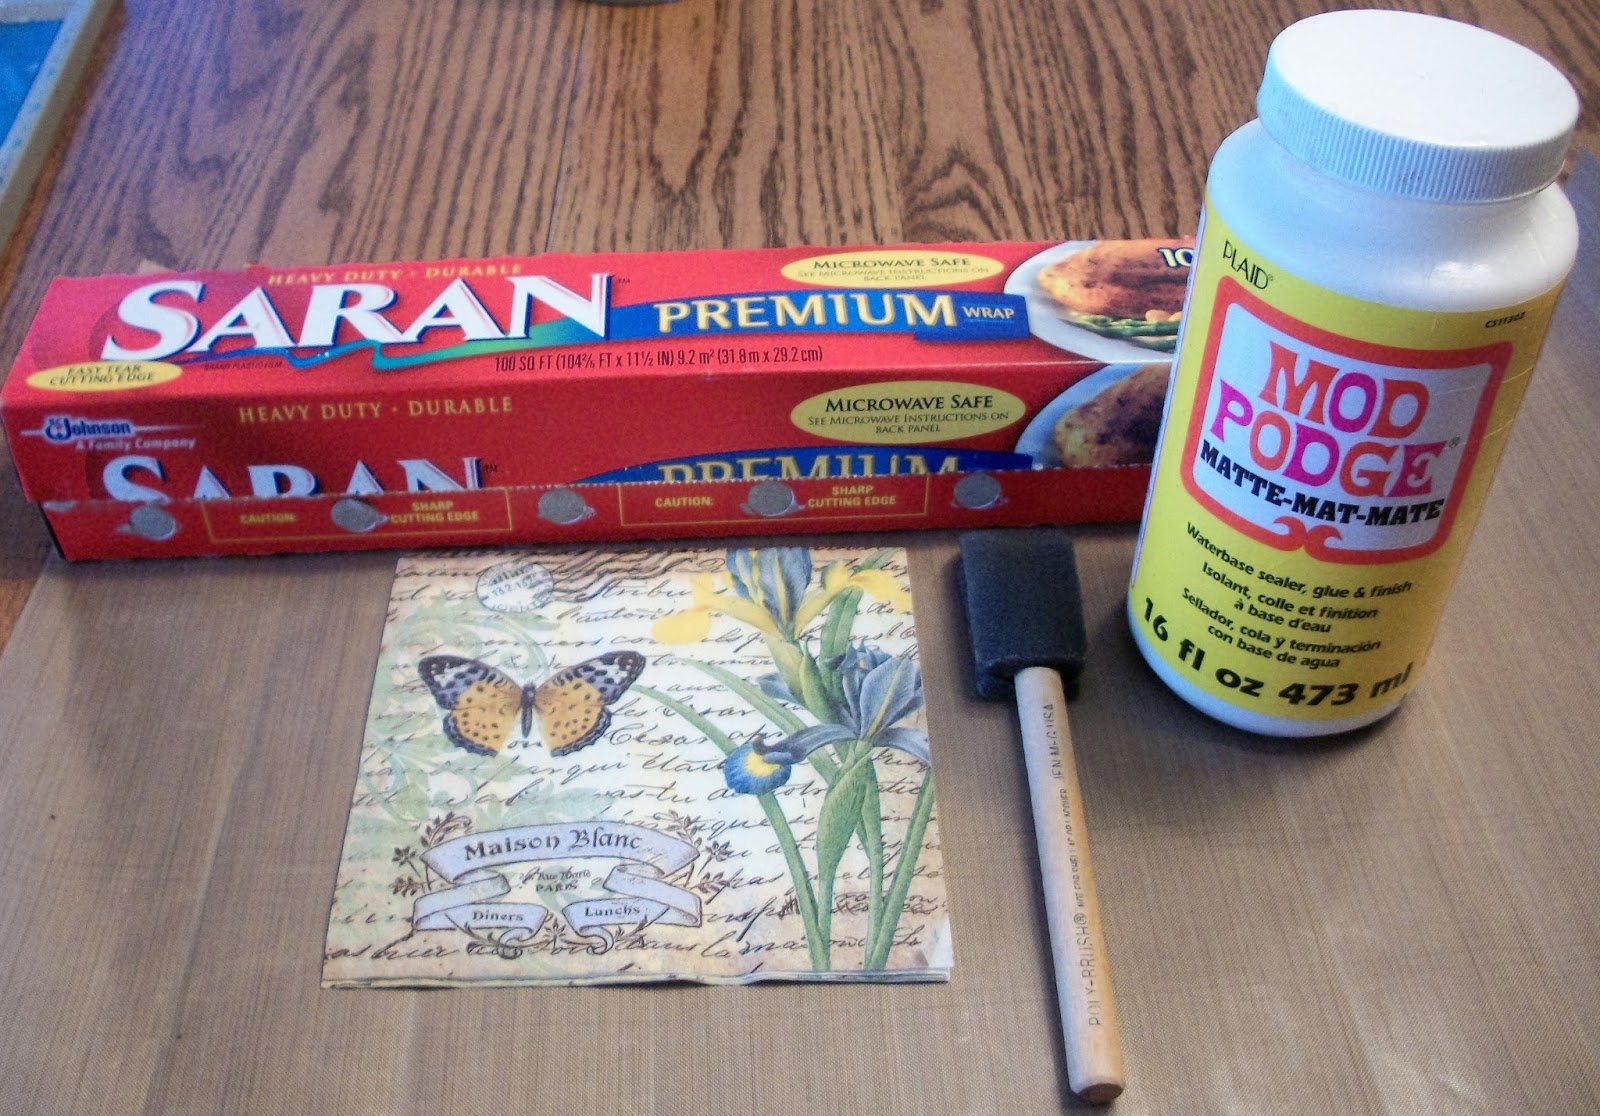
Decorative napkin- I found at the Dollar Tree, Matte Mod Podge, Sponge Brush and Saran Wrap


1.  Begin by separating the layers of your napkin.  I've found that generally is one layer but sometimes there are two.

2.  Lay out a piece of Saran Wrap large enough that the napkin will fit on top.

3.  Using your Sponge Brush, apply Mod Podge all over the surface of the Saran wrap. Make sure to cover enough space so the entire napkin has Mod Podge under it when you lay it down.


4.  Place the Napkin on top of the layer of mod podge. Try to lay as flat as possible.

5.  Take your Sponge brush and then apply another layer of mod podge all over the top of the napkin. **** You may have to daub the Mod Podge on instead of brushing it to keep the napkin from tearing.


6.  Allow to completely air dry overnight.

7.  Once the napkin is completely dry peel it off of the Saran Wrap Carefully. It is now ready to use.  You can cut it in pieces to use as the background for a card or Cut individual elements out to use as embellishments.


8. Your Napkin ends up more translucent and sturdy making it easier to Cut and use.


Complete your project

Monday, December 11, 2017

Project of the week for Repeat Impressions Stamps

Hi everyone, Deonna here, I'd like to share a 
Quilted, embossed Christmas Card with all of you today. 

This will be my last Project of the week with Repeat Impressions for awhile. After much deliberation, I've chosen to step down off the design team.  I just think that i need a break for awhile. That doesn't mean that i may never be back.  I may be begging to come back. lol!
Anyway, let's just get started with my tutorial. 


Supplies

RI Stamps- 9402U Quilt frame
9403P Quilt Background- I cut all of mine apart.
9404H Our Friendship, 9408H Friendship quilt square.
Cardstock base- baja Blue Cut at 4 1/4" x 11"
Red Cardstock at least 4 1/4" x 5" and a scrap for the sentiment
Embossing stamp pad
Black detail embossing powder-Recollections
Heat Tool
Paper trimmer
Black ink- Ranger Archival
"Let it Snow" Patterened paper pieces- 5 to 6 different prints.
Scissors
Powder tray or piece of Scrap paper
Glue 


1.  Gather the above supplies and stamp using Stamp # 9402U -Quilt Frame onto the Red cardstock using the black ink. Trim the Square out leaving 1/4" border around the image. Set aside.


2.  Gather various pieces of Coordinating patterned paper that you want to use. (This would be a good time to use your scraps) 

Using your embossing ink, powder tray and black embossing powder, stamp each of the individual stamps from the quilt background 9403P that were used on the Quilt frame 9402U (above is step 1) 
With the embossing ink - Stamp each of the corners onto your chosen patterned paper. Stamp twice with one scrap and twice with another patterned paper. You will need to stamp 4  of each of the same design for the last 2. Add embossing powder and heat Set. 


3.  Once each square is embossed, cut each of them out using your scissors and set aside. 


4.  Repeat step 2 and 3 with the square stamp 9408H  Friendship quilt square. Stamp the image with Embossing ink onto 2 different patterned papers. Cut out the entire stamped image of the first and just the star center of the second. set aside. 


5.  Stamp and emboss the sentiment 9404H- Our Friendship onto a piece of Red Cardstock. Trim into a square.  Trim a piece of Patterned paper slightly larger then the sentiment. 


6.  Lay each piece onto the stamped quilted square on the red cardstock from step 1. Make sure that your paper pattern is going the direction that you desire and glue each one down over the top of the base stamped image. Glue the star onto the center square and glue into the center of the quilted square. Glue the entire quilted square onto your blue card base. Glue down the sentiment and embellish as desired. 


 I chose to only add some buttons that i had in my stash. 
Finished Card


Have a wonderful day!

Challenges that i'd like to join

Glitter n Sparkle #268 ATG
Scrap and Craft #10 ATG Christmas
DL Art December  ATG 1 ea. day
The Merry Christmas #46 ATG Christmas)
A Perfect time to Craft ATG December (2/3)
Christmas Cards all year Round December ATG (2/5)
Crafty Hazelnut's Christmas Extra Dec. Christmas
Jo's Scrap Shack #218 ATG (1/3)
Winter wonderland ATG Christmas (1/3)
heARTful Stamping Christmas plus stamping (1/2)

Have a great day and i hope that i've inspired you to create.

Monday, July 13, 2015

Project of the Week- Double Sided Magnetic Bookmark


I everyone! It's Deonna and today I've written a new Tutorial for Repeat Impression Stamps at A House that Stamps Built on making double sided Magnetic Bookmarks. They are great to add in a book, Junk journal, or just a decoration in an altered project.


Supplies Needed/Used
Repeat Impressions-  S9308-C, Bee Stamp
Copic Markers
Memento Black ink
Black, yellow Cardstock
Black and White Striped Designer Paper
X-Press it Blending card
Stampin'up Punches in 1-1/4", 1-3/8" and Scalloped Circle
2-3/4" Scalloped Circle Spellbinders Die
Basic Grey Small magnets (1-Positive and 1-Negative)
Glue, Glue Dots and Scotch tape
Big Shot die Machine
Scor-Pal
Paper Trimmer


1. Cut a Piece of black cardstock to 8-1/2"x 5-1/2", Score at 2-3/4" line on the 5-1/2" side of the paper.


2. Fold in half on score line and cut in 2-1/8" increments (should make 4)
3. Taking a piece of your black Cardstock, line the 2-3/4" Scalloped Circle die and run through your die-Cut machine as in the photo example.

4. Taking you black and white lined paper and your Scalloped Circle punch. punch out 2 scalloped Circles.
 
5. Punch your yellow Cardstock twice with the 1-3/8" circle punch.
6. Take your Bee Stamp and stamp it twice with your Memento Black ink. Color if desired and then punch out both bee's with your 1-1/4" Circle Punch.


7. Position your Positive Magnet on the outside of your black scalloped book mark piece and tape down with scotch tape. Turn the piece over and allow the negative magnet to adhere to the positive through the Cardstock. Tape down with scotch tape.


8. Take your liquid glue and adhere over the tape holding the magnet in place. Then, apply your scalloped Circle over. Turn over your black Cardstock and repeat.
9. Using a Medium glue dot adhere the yellow circle to the center of the scalloped circle then repeat with your stamped bee circle. Turn over your black cardstock and repeat.


10. Your bookmark is now Complete!


Challenges
 
Crafty Friends Anything goes
Lil Patch of Crafty Friends #13 Anything goes 10C
Not just Cards #22 Anything goes UL
Papertake Weekly Anything goes
Inspiration Destination #41 Anything goes
Crafty Catz #287 Summer
Stempelsonnen Anything goes (1/3)
Fan-Tastic Tuesday #93 Anything goes/in the Garden
Top Tip Tuesday Summer Fun w/ tutorial for tip

Have a Great Monday!!!