
Hi everyone, Deonna here, I'd like to share a
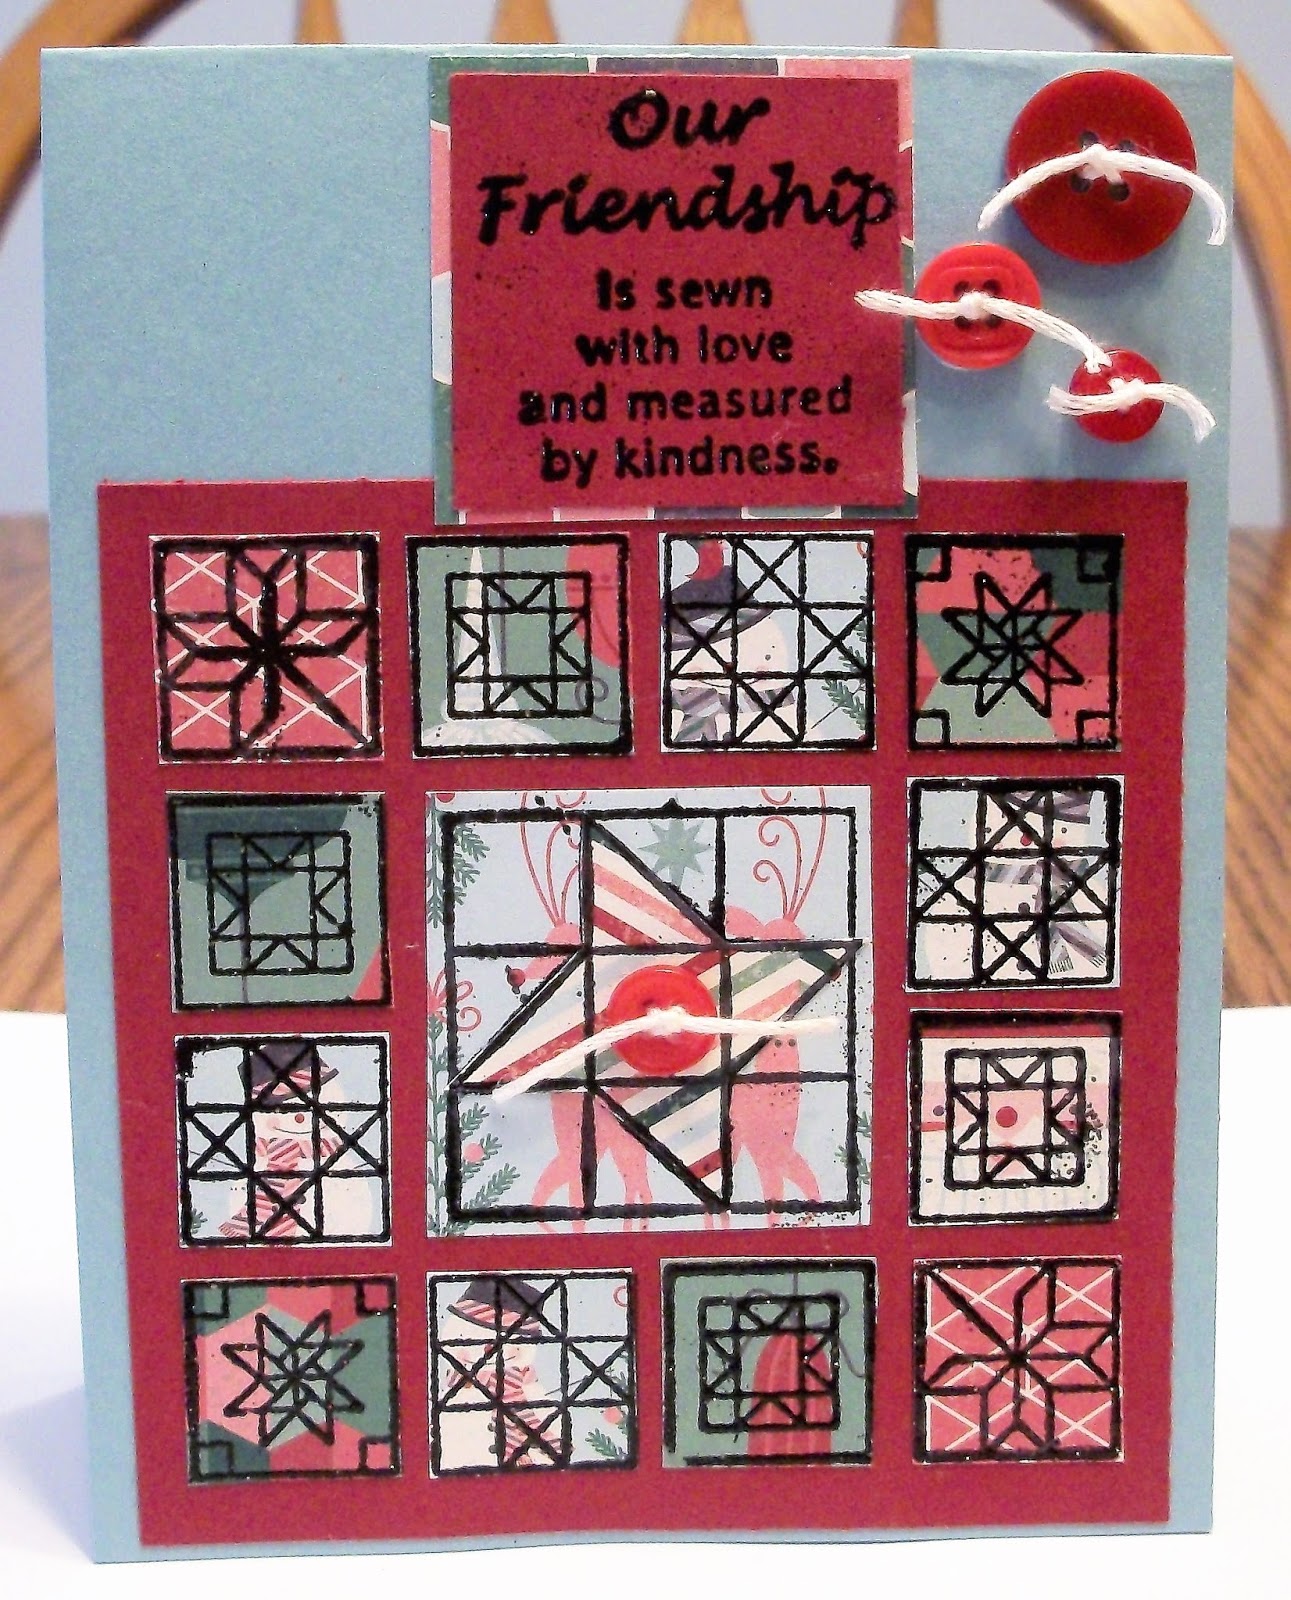
Quilted, embossed Christmas Card with all of you today.
This will be my last Project of the week with Repeat Impressions for awhile. After much deliberation, I've chosen to step down off the design team. I just think that i need a break for awhile. That doesn't mean that i may never be back. I may be begging to come back. lol!
Anyway, let's just get started with my tutorial.
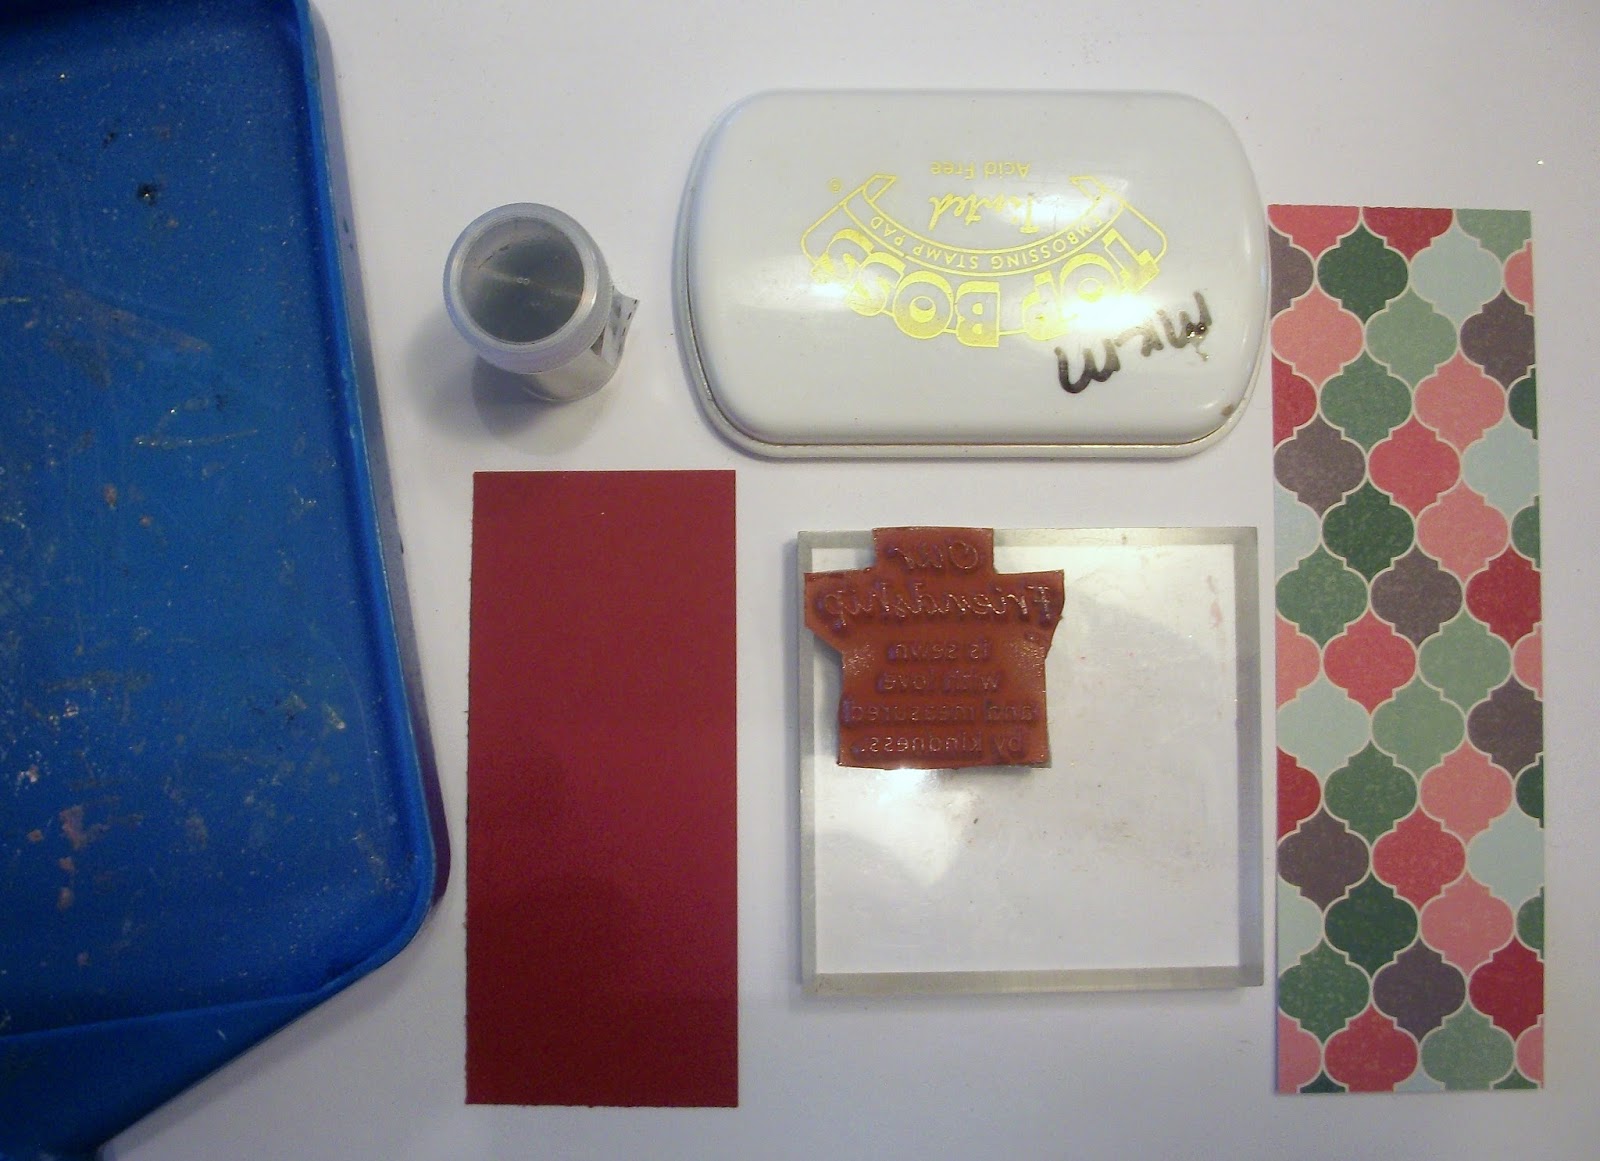
Supplies
RI Stamps- 9402U Quilt frame
9403P Quilt Background- I cut all of mine apart.
9404H Our Friendship, 9408H Friendship quilt square.
Cardstock base- baja Blue Cut at 4 1/4" x 11"
Red Cardstock at least 4 1/4" x 5" and a scrap for the sentiment
Embossing stamp pad
Black detail embossing powder-Recollections
Heat Tool
Paper trimmer
Black ink- Ranger Archival
"Let it Snow" Patterened paper pieces- 5 to 6 different prints.
Scissors
Powder tray or piece of Scrap paper
Glue

1. Gather the above supplies and stamp using Stamp # 9402U -Quilt Frame onto the Red cardstock using the black ink. Trim the Square out leaving 1/4" border around the image. Set aside.


2. Gather various pieces of Coordinating patterned paper that you want to use. (This would be a good time to use your scraps)

Using your embossing ink, powder tray and black embossing powder, stamp each of the individual stamps from the quilt background 9403P that were used on the Quilt frame 9402U (above is step 1)
With the embossing ink - Stamp each of the corners onto your chosen patterned paper. Stamp twice with one scrap and twice with another patterned paper. You will need to stamp 4 of each of the same design for the last 2. Add embossing powder and heat Set.


3. Once each square is embossed, cut each of them out using your scissors and set aside.


4. Repeat step 2 and 3 with the square stamp 9408H Friendship quilt square. Stamp the image with Embossing ink onto 2 different patterned papers. Cut out the entire stamped image of the first and just the star center of the second. set aside.


5. Stamp and emboss the sentiment 9404H- Our Friendship onto a piece of Red Cardstock. Trim into a square. Trim a piece of Patterned paper slightly larger then the sentiment.

6. Lay each piece onto the stamped quilted square on the red cardstock from step 1. Make sure that your paper pattern is going the direction that you desire and glue each one down over the top of the base stamped image. Glue the star onto the center square and glue into the center of the quilted square. Glue the entire quilted square onto your blue card base. Glue down the sentiment and embellish as desired.


I chose to only add some buttons that i had in my stash.
Finished Card


Have a wonderful day!
Challenges that i'd like to join
Glitter n Sparkle #268 ATG
Scrap and Craft #10 ATG Christmas
DL Art December ATG 1 ea. day
Challenges that i'd like to join
Glitter n Sparkle #268 ATG
Scrap and Craft #10 ATG Christmas
DL Art December ATG 1 ea. day
Inspiration Destination 139 ATG UL
The Merry Christmas #46 ATG Christmas)
Crafting with an Attitude #34 ATG (1/3)
A Perfect time to Craft ATG December (2/3)
Christmas Cards all year Round December ATG (2/5)
Crafts Galore Encore ATG (2/3)
Crafty Hazelnut's Christmas Extra Dec. Christmas
Jo's Scrap Shack #218 ATG (1/3)
Winter wonderland ATG Christmas (1/3)
heARTful Stamping Christmas plus stamping (1/2)
Have a great day and i hope that i've inspired you to create.
11 comments:
I love quilt cards! So fun that you made a pretty, paper-pieced Christmas quilt...such a cool idea!
Sorry I didn't get to work with you on the team for long, but I certainly understand needing a break! Still following your blog, so I'll get to see the projects you post here!
Merry Christmas to you and yours.
Oh this looks great. Nice work and thanks for the step-by-step pic tutorial too.
Thank you for sharing with us over here at "A Perfect Time To Craft" and best of luck with your entry.
Annette DT for http://aperfecttimetocraft.blogspot.com.au/
Beautiful Christmas card Deonna. Thank you for playing along with our Challenge at Christmas Cards All Year Round. We would love to see you again ... Anet DTx
Thanks for joining us at CraftyHazelnut's Christmas Challenge Extra for December!
Monica - DT
Your embossing and sentiment go so wonderful with the homemade quilt. Thanks for the tutorial too. It is wonderful. Thank you so much for joining us at The Merry Christmas Challenge Anything Goes/optional twist Fun Folds challenge.
Tamie DT
Great project!
Thank you for sharing with us over here at "A Perfect Time To Craft" and best of luck with your entry.
Ania DT for http://aperfecttimetocraft.blogspot.com.au/...
A lovely looking card with lovely image. Well done! Thanks for joining us over at Winter Wonderland this time around.
Love n hugs
Marie
Beautiful
Thank you for sharing with us over here at "A Perfect Time To Craft" and best of luck with your entry.
Anila DT for http://aperfecttimetocraft.blogspot.com.au/...
A very beautiful card.
Thank you for joining us in Crafting With An Attitude.
Regards, BożenA DT CWAA
This is a very sweet card, and thanks so much for the step-by-step on how you made it! Thanks for sharing with us at CCAYR! 😀
~Marie B -DT
Post a Comment